Forms (LDP)
-
- Create LDP Form Asset
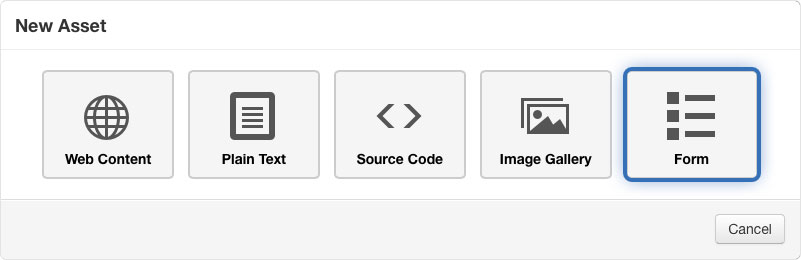
Create LDP Form Asset
Create a LDP Form by navigating to the Assets, and create form.
Before saving your form, you must fill in a form submission success and failure message. Feel free to customize this text, but this should help you get started.
Success message:Your form submission has been sent. A copy of your submission will be sent to your email address submitted above.
Failure message:Your form submission requires additional information. No data was submitted.
- Datasets:
Datasets:
Do you have reoccurring data for drop downs or radio buttons?
We can create datasets with commonly used data. Examples include States, State Abbreviations, Months, Countries, and more. Simply request a set to be created to Eric Turner and one of the web team members will create a new set.
dataset=state; (California, Alabama, Alaska, etc.)
dataset=state_ab; (CA, AK, AL, etc.)
dataset=numbers; (1,2,3,4,5,6,7,8,9,10,11,12,13,14,15,16,17,18,19,20, etc.)
dataset=month; (Jan, Feb, Mar, etc.)
dataset=countries; (United States, Afghanistan,Albania,Algeria,Andorra, etc.)
Inserting into LDP Form
Syntax:
dataset=wharehouse_paper_color;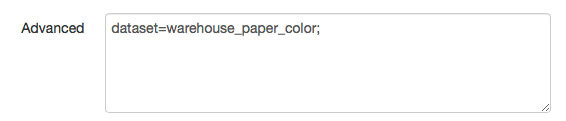
Advanced, Web Developer Access:
Path:
/_resources/_xsl/_shared/datasets.xslExample:
<xsl:when test="ou:get-adv($adv,'dataset') = 'warehouse_paper_size'"> 8-1/2 x 11, 8-1/2 x 14</xsl:when>
<xsl:when test="ou:get-adv($adv,'dataset') = 'warehouse_paper_color'"> White, Blue, Buff, Canary, Goldenrod, Green, Pink</xsl:when>(I suggest copying an existing row, then edit the duplicate. This way you are less likely to miss a character)
- Form Fields
Form Field Options

Recommended for most form fields such as names, email addresses, etc.

Recommended for Advanced Field: rows=10;


Form Field Validation
Email
ADVANCED: Omni Update Support Documents
- CSS Styles
CSS Styles
Asset:
You can add a CSS class name by using the syntax: addclass=className;
Content Page (.PCF/HTML):
You can call up a class using the following syntax: <span class="className">…</span>
Formatting your form fields:
Using the form name/ID from your Asset you can stylize your form fields.
Example:
<style type="text/css">
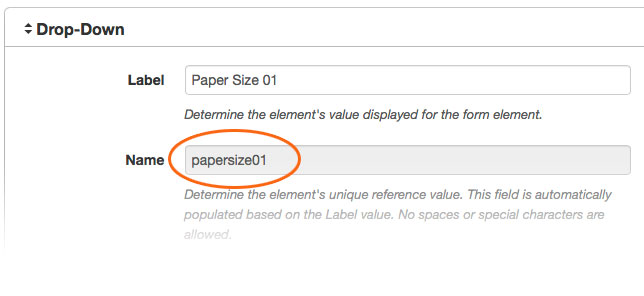
@media (max-width: 80em) <!-- Mobile --> {#papersize01, #papercolor01, #paperquantityreams01,
#papersize02, #papercolor02, #paperquantityreams02,
#papersize03, #papercolor03, #paperquantityreams03,
#papersize04, #papercolor04, #paperquantityreams04,
#papersize05, #papercolor05, #paperquantityreams05 {padding: 0 0 20px 0;
}
}
@media (min-width: 80em) <!-- Desktop --> {#papersize01, #papercolor01, #paperquantityreams01,
#papersize02, #papercolor02, #paperquantityreams02,
#papersize03, #papercolor03, #paperquantityreams03,
#papersize04, #papercolor04, #paperquantityreams04,
#papersize05, #papercolor05, #paperquantityreams05 {display: inline-block; width: 320px; margin: 0 20px 0 0; }
#phonenumber, #email, #dateneeded, #buildingnumber, #roomnumber {
display: inline-block; width: 200px; margin: 0 20px 20px 0; }
#mtsacletterhead, #padwhitescratch4x6, #padtransmittal,
#padtelephonemessage, #padwhiteruled812x11, #padstenobook6x9,
#paperwhiteruled812x11 { width: 200px;
}
}
.reamscase:before {content:"(10 Reams in a Case)"; vertical-align: bottom;}
#papersize01:before {content:"Paper by the Ream:"; font-weight: bold; vertical-align: top;}#padwhitescratch4x6:before {content:"Pads:"; font-weight: bold; vertical-align: top; display: block;}#paperwhiteruled812x11:before {content:"Paper:"; font-weight: bold; vertical-align: top; display: block;}
</style> - Email Confirmations
Email Confirmations
An email can be sent to both the recipient and the person filling out the form. I suggest providing an email containing all the information submitted in the form.
Double Curly Braces {{}} are used to enclose each form Name/ID as shown in the LDP Form Asset.
Sample:
Order Requested by: {{personrequesting}}
Phone: {{phonenumber}}
Email: {{email}}
Date Needed by: {{dateneeded}}
Building: {{buildingnumber}} Room: {{roomnumber}}Paper Size | Paper Color | Quantity of Reams
{{papersize01}} | {{papercolor01}} | {{paperquantityreams01}}
{{papersize02}} | {{papercolor02}} | {{paperquantityreams02}}
{{papersize03}} | {{papercolor03}} | {{paperquantityreams03}}
{{papersize04}} | {{papercolor04}} | {{paperquantityreams04}}
{{papersize05}} | {{papercolor05}} | {{paperquantityreams05}}
You want to be sure the the content around the curly braces makes sense when read.
A copy of all form data submitted is also available in a .csv file within the Asset.
- Create LDP Form Asset
