Reference for Omni Update
Master Slider/Banner Graphic
The Master Slider is in two parts. You need to create an image asset, and you need to select the asset on the page.
Graphic Selections
The slider images were intended to be simple images with no text. If you add text, be cautious of the title safe areas so your text isn't covered by the navigational buttons, etc.
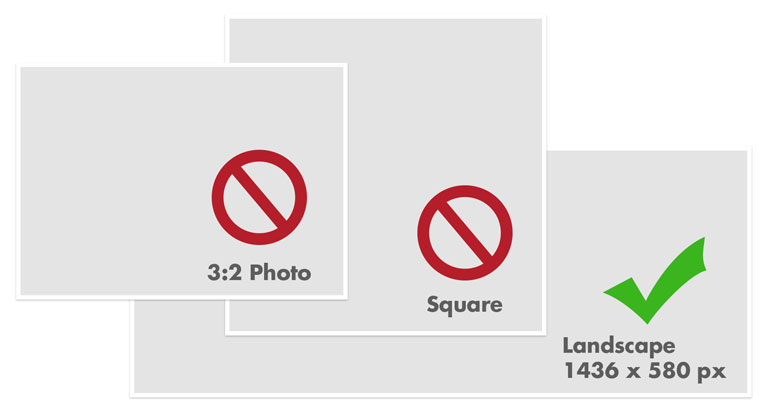
Images should be in landscape format. Images that are portrait, square, or typical 3:2 photo formats will not work properly. Photos need lots of negative space, space surrounding your subjects such as student faces.
*Remember text within the image needs to be added to the Caption field in the slideshow asset to comply for ADA accessibility.
Take note, the images in the Master Slider are not fixed in height and width, they are flexible to the view window of the browser or device. The larger the screen, the greater the width that is displayed, and less of the height. The images are centered in height and width.
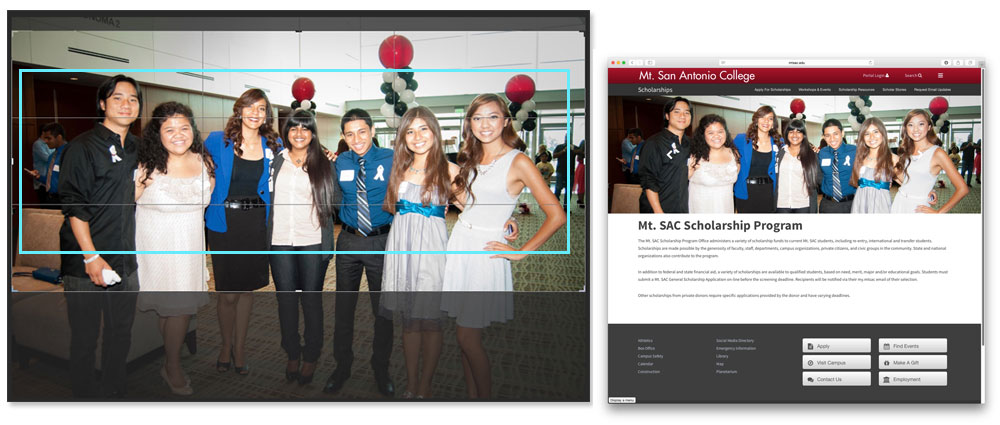
The graphics break the rules on photo composition. Slider images need to have the subject in the middle of the image as the top and bottom portions of the image are cropped on certain aspect ratios. Keep in mind, if you have portraits where the heads are in the upper 1/3 of the image, they will likely have their heads cut off. In the example below, the original photo appeared with headless students. By simply cropping the image differently, the image appeared fine. Keep the subject to the center 3rd of the output image.
Text
Text can be added in both the Title and Description fields within the Image Gallery Asset. Also, please remember to add a caption for accessibility.
Template
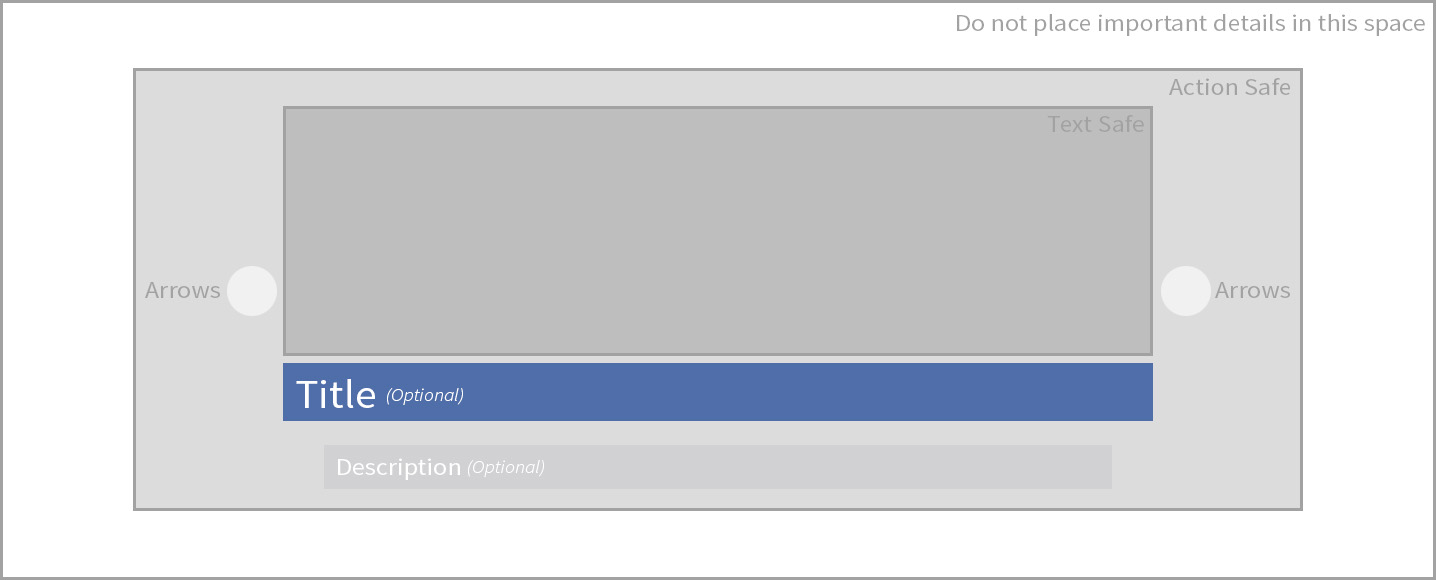
Here's a basic template showing the title safe and action safe areas. Action Safe simply means this is where you can place your subject, the edges may crop slightly, but this is a good reference guide. Space outside of action space will disappear on large monitors as more of the image is cropped. The photoshop files have guides that can be turned on and off. The blue and gray Title and Description sections are for placement purposes. Add the actual Title and Description in the Gallery Asset so they will be ADA accessible.
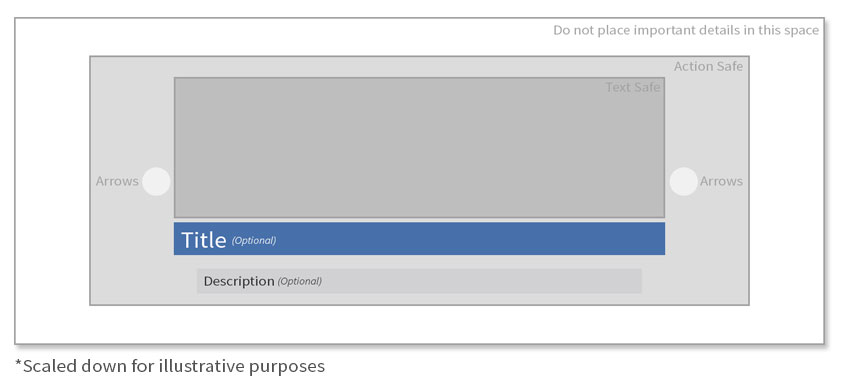
- Photoshop Template (1436 x 580px)
- JPEG Reference
- Extremely Wide Photoshop Template (2300 x 580px)
- Extremely Wide JPEG Reference
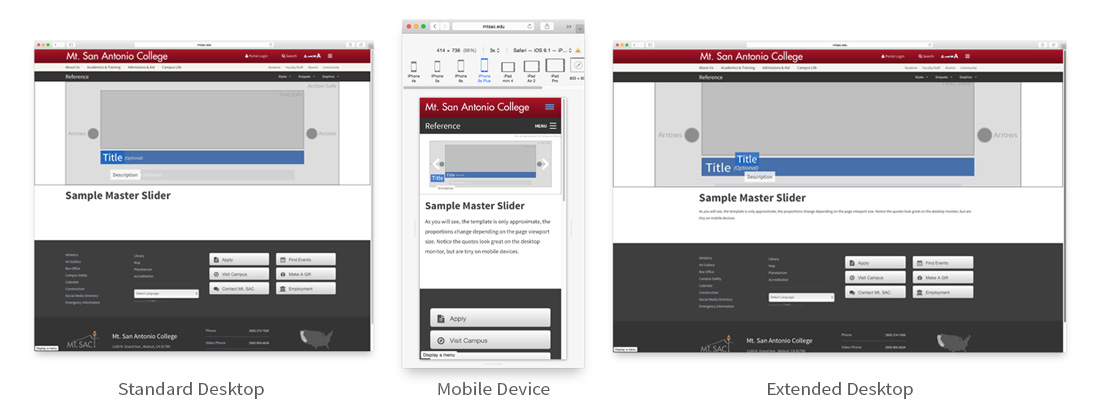
The template only provides an approximate guide. See example here, then resize your window. The template isn't an exact science, the template is merely a starting point for your own exploration. The size of the example is 1436px x 580px at 72dpi. Notice the title and description match up pretty well on the desktop. On a mobile device, everything scales down, the title and description move in placement. Expanding the browser window on very large screens, you begin losing more of the top and bottom portions of the screen, even cutting into the Title Safe area.
If you are simply placing photographic images, 2000px x 600px should be a good compromise. Ideally, when exporting images from Photoshop, file sizes should be 100-300kb. If your images are a half megabyte or larger, ask the web team for assistance in resizing the graphics.
Export Images from Photoshop:
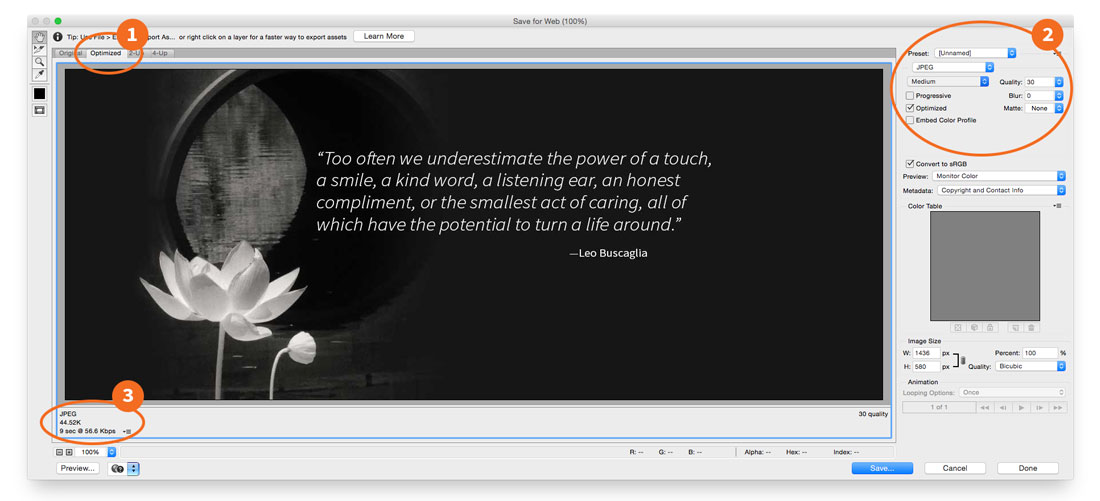
When exporting images from Photoshop, go to File: Export: Save for Web (Legacy).
- Check to see that the Optimized preview tab is selected.
- Select JPEG, then Medium. If your text or details in the photo become pixelated, adjust the Quality Slider higher. Use the lowest number without losing too much detail. This will provide a smaller file size.
- Refer to the section labeled 3, this shows the an approximate file size. With these large files, try to stay around 100-450k. These larger images will slow down the user experience online. Also take into consideration not to have too many slides as this requires more data to be transferred to the end user.
Sample Master Slider using Layout Template
Sample Master Slider using photos and built in Title/Description fields
Recommendations:
- Leave text out of the graphics, only use the Title and Description fields as necessary.
- Gradients, high contrast, high detail images incur larger file sizes.
- White space or solid colors reduce file sizes.
- Typically you can export images as a JPEG at Medium
- For photo galleries, try to limit your gallery group to 6 photos
